Today i wanna talk about how you can host your blogspot to any of this format, .TK .CF .GA .ML .GQ its very easy to it yourself. Are you feeling that your long domain name like your-webname.blogspot.com, giving you bad reputation at many points of view? If your answer is yes! Then you came to right place and read out my post.
Why should I change to custom domain?
Search engines except Google, rest of all will never result your blogspot well at their listing. Social networking sites don’t like your blogspot.com tag when compared with top level domain. They don’t love to back link you. Moreover, the blogspot.com domains are blocked by some Internet service providers including China. You can also get custom e-mail like admin@your-domain.com with Google Apps. So this time, I am posting step by step guide to set up various custom domain using freenom like .gq, .ga, .tk, .cf, .ml, etc.
Guide to set up a Freenom (.gq .ga, .cf, .ml, .tk) custom domain using free DNS service:
Registering Freenom Domain:
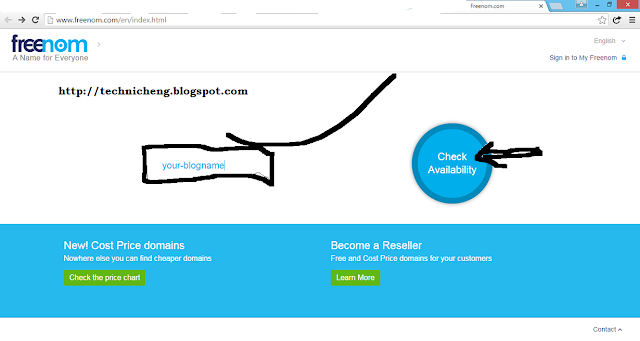
1. Go to Freenom.com website.
2. Enter your preferred Freenom domain name and click Go. If entered domain is available, you will be promoted for further steps.
Now it shows availability of your domain. For free domain you need to produce minimum of 25 hits per 90 days. Free domain has same services as paid domain. Select your choice and move on to next step.
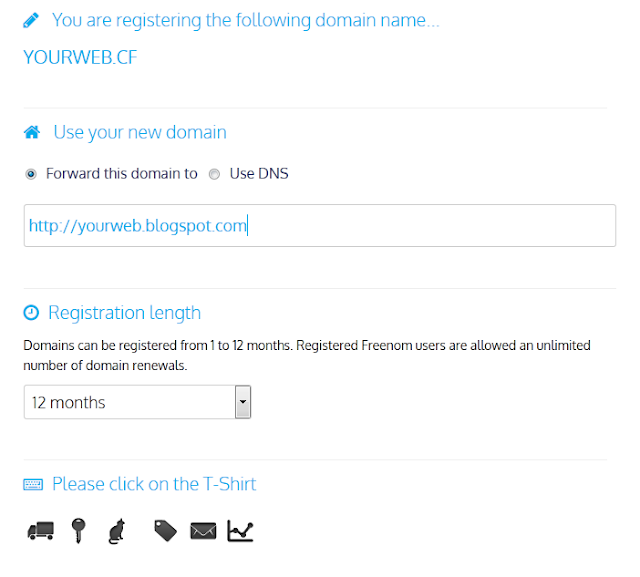
Enter your blogspot URL and set registration length as 12 months. Now sign up with Freenom. Here you have to verify your Freenom account by email or you can also use social Networking accounts like facebook, yahoo, flicker etc.
Now Setup your Freenom in Blogger:
Login to your blogger account.
Go to Settings and find Publishing option in your dashboard. Now click on Add a Custom Domain. You will be prompted to buy a domain for your blog.
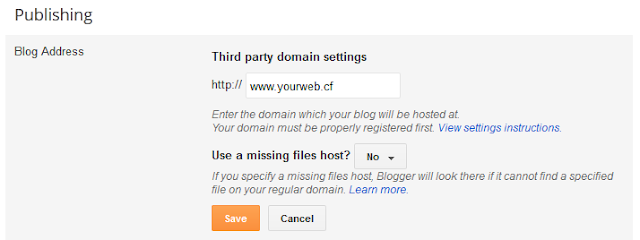
Simply click on + Setup a 3rd party URL for your blog. Then enter your Freenom domain with www in the place of www.yourwebname.cf (as shown in the picture). Now you have to verify domain ownership by adding two CNAME records. For this, click on Save. You will see error like this CNAME values with detailed set up instructions.
Don't panic it's justa instruction for Domain setup.
Now Setup DNS Configurations in your Freenom Account:
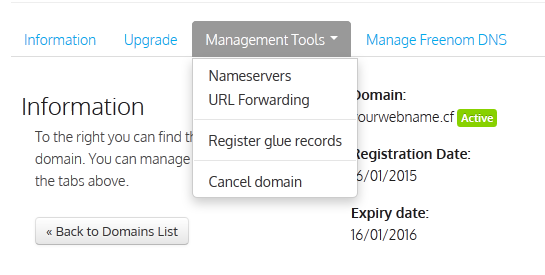
Now log on to your Freenom account and click on My Domains. It gives the list of your all Domains. Now, click on Manage Domain.
Now click on Management Tools > Name Servers.
Use Default Name Servers > Change NameServers.
Manage Freenom DNS option to configure DNS Settings for your domain.
Note: 1st fill up line will be Default by A and 216.239.32.21 , for the 2nd and 3rd line fill up from the error from STEP II > Instruction 3. By the way 2nd and 3rd line will be CNAME
Before you move onto next step, wait about 30 min or an hour for your DNS settings to activate. ( My Suggestion: wait 2/3 minute :p instead of 30). Then hit the Save button.
Now Saving Your Custom Domain settings in Blogger:
Again go to domain settings then ☑ tick the option Redirect yourwebname.ml to www.yourwebname.ml and save settings.
For easy understanding watch this video now it will help you more.
If you have any trouble in following any of the steps, you can drop comment in the comment section or CONTACTING US now.
If you have any trouble in following any of the steps, you can drop comment in the comment section or CONTACTING US now.
Enjoy please share this post to your friends.


This realy help me check this www.pcandmobilesolution.cf
ReplyDeleteYour welcome Mr. Boy...
ReplyDelete